
Exclusive Pumper
Exclusively pumping is a form of breastfeeding where a mother strictly pumps to provide breast milk for her baby. It’s often mistaken that exclusively pumping is easier than nursing. However, exclusively pumping is very demanding, takes a great deal of sacrifice, and comes with its own struggles. Since the pump isn’t as efficient at transferring milk from the breast an exclusive pumper has to pump more often than a baby would nurse and for possibly longer sessions. Also again since the pump isn’t as effective an exclusive pumper has a greater chance of getting clogged ducts, mastitis, thrush, and sudden unexpected dip in supply. That being said if it comes down to strictly pumping breast milk or no breast milk at all then pumping is a good option. Breast milk is beneficial no matter from tap or bottle.**Note: The information listed is directed towards exclusively pumpers or frequent pumpers. There are some information varies if you are a mother who is nursing.
What does an exclusive pumper schedule look like?
In order for an exclusive pumper to maintain supply, the mother needs to pump more frequently than baby nurses because the pump isn’t as efficient at transferring milk from the breast. This includes continuing to wake throughout the night to pump even if baby starts to sleep all night or for longer periods of time. An exclusive pumper schedule is every 2-3 hours during the day and every 4 hours max at night for at least the first 8-12 weeks. After breast milk is established a pumper may decide to go longer periods of time without pumping. Nevertheless, an exclusive pumper should never go over 5 hours without pumping unless she is trying to wean from breastfeeding. Going past the 5-hour mark increases chances for painful engorgement, clogged ducts, mastitis, and thrush. Plus may lead to a dip in supply if done frequently enough.
How long does an exclusive pumper pump for at a time?
The length of session can vary for each mother depending on how well she responds to the pump. On average it takes most exclusive pumpers 20-40 minutes a session to be fully expressed. When strictly pumping a mother needs to continue her session until what we refer to as “empty”. Now a breastfeeding mother’s breasts are never actually empty but what this term means is that you pump until little to no milk comes out for 5 minutes without a letdown.
How do I use letdown mode and set suction level?
If your pump is a two-phased pump meaning it has a letdown/vibration mode and a drinking phase you want to start with letdown mode. A few pump brands that commonly have a letdown mode is Medela, Spectra, Hygeia. The letdown mode mimics how a baby sucks quickly to get the milk flowing from the breast. This typically starts automatically for most brands. If it does not start automatically find the letdown button on your pump and press that once to start. Use this mode until milk starts to flow and then switch to drinking phase.
If your pump does not have a letdown mode (Ameda or Evenflow for example) you can still try to encourage a letdown with a few simple steps. First, before pumping tries to relax by getting a drink and a snack. Then massage breasts and use warm compresses. Massage all the way from the collarbone and armpit because the glands extend that far moving towards your nipples. The idea with these two techniques is to relax the glands and loosen blood vessels to help milk flow. Try this for roughly 5-10 minutes before pumping.Drinking phase is exactly as it sounds. It mimics how a baby slows their sucking patterns while drinking. This is when a mother may need to adjust the suction strength. Determining how high/low to set suction level varies from mother to mother. Remember higher the suction doesn’t necessarily mean you’ll express milk faster or get more of an output. What most brands recommend is to slowly increase the suction by turning the knob until it’s just uncomfortable and then decrease the suction back slightly to a comfortable suck. If the suction never feels uncomfortable to you start at about 50% strength and play with strength at different levels to find what works best for you. Finding proper suction to what your body responses best to takes some experimenting.
If you are using a pump that uses the number system to change suction level instead of a knob like Spectra for example. You’ll want to increase the number by one until it’s just uncomfortable and then decrease the suction back by one number. Finding the proper suction level your body responds best to takes some experimenting.If at anytime milk stops flowing, drastically decreases or slows to small few drops but you don’t feel properly drained press that letdown button on your pump to restart your letdown mode. Doing this may encourage another letdown for you. – If your pump does have a letdown mode try taking a small break (3-5 minutes). During this time once again try to relax, massage and use heat. Then try pumping again. Doing this may encourage another letdown for you.
What should my output be? How much milk should I be making?
Once your milk is established a normal output per session for an exclusive pumper is 2-4.5 Oz and that’s both breasts combined. A breastfed baby needs 24-36 oz per day. It’s a common concern for an exclusive pumper to want to have a large freezer stash but you do not need a freezer stash to be successful at exclusively pumping. It is perfectly fine to make exactly what your baby needs one pumping session to the next or one day to the next.
****Keep in mind that the goal is to feed the baby not the freezer.****
How much milk should my little one be eating?
Serving size for a breastfed baby is entirely different than that of a formula fed baby. Serving size for a breastfed baby is 1-1.5 ounces per hour they have gone without eating not exceeding 5 Oz per sitting no matter what the age, weight or size of the baby is. The total amount of milk a baby needs is a minimum of 24 and around the maximum of 36 ounces. A child going through a growth spurt may need an additional .5-1 oz per sitting but this should only be offered following guidelines of pace feeding. All bottles should be pace fed. If you need instructions on pace feeding please see our pace feeding file.
https://www.facebook.com/notes/2878…
http://breastfeedingstruggles.com/a…http://kellymom.com/bf/pumpingmoms/…
How do I store breast milk?
Here is a great article on length of storage for breast milk. http://kellymom.com/bf/pumpingmoms/milkstorage/milkstorage/
For more information please see our storage file.http://breastfeedingstruggles.com/a…
What is power pumping and why is it important?
Power pumping is an hour long pump session that mimics how a baby cluster feeds during a growth spurt or mental leap. This helps maintain and increase supply. It’s recommended for an exclusive pumper to try to power pump at least once a week. Mothers who are struggling with supply or a dip may benefit from power pumping more often. However, should not go over five times a week. If you are a mother with an oversupply you may not need to power pump at all. The key with power pumping is if milk is flowing do not stop pumping even if that means you extend the suggested time frames. On the other hand, if milk isn’t flowing continue to pump the recommended time frames because our bodies work on supply and demand. The more you pump you’re telling your body to boost supply. See meme for instructions on how to power pump.
-Another way to power pump is to find an hour long tv show. Pump while the show plays and during commercial breaks, you take a break from pumping.
Why is my mik different colors (orange, white, pink, clear, blue, green)?
If you’re pumping shortly after the birth of your baby and milk the is gold or orange you most likely pumping colostrum and your milk hasn’t come in yet. Milk can take 3-5 days to come in.
If your milk is pink or even red you most likely have a bit of blood in your milk. This can be caused for numerous of reasons such as cracked nipples, milk blisters, clogged ducts, rusty pipes. . . Bloody milk is safe to offer. If your baby was nursing you most likely wouldn’t notice the blood tinge milk. Just keep in mind what goes in must come out. Therefore you may notice some differences in your baby’s diapers. If this makes you uncomfortable use milk for a milk bath or put in the refrigerator. In the refrigerator, the fat begins to separate and most of the blood will separate with it. Then majority can be scooped out.
Green, blue, orange (not colostrum)? These are most likely caused by food dye in your diet and are completely normal. Or could be the difference between fore and hind milk. Milk is still safe to offer.
Breast milk when sitting at room temperature for awhile, in the refrigerator, or in the freeze will begin to separate. This means there may be a thick or thin layer of fat or “cream” at the top of the bottle. The cream may be a different color than the rest of the milk or even lumpy. The bottom may look clear, cloudy, or watery. This does not mean milk is spoiled. Spoiled breast milk has a very distinctive sour smell.
When freezing breast milk you may notice spots. This is the fat that has started to separate while the milk begins to freeze. This is normal and not freezer burn. Do not stress on the amount of cream/fat that is separated or in your milk. See next question for more information.
What about the fat in my milk?
The amount of fat in your milk can vary from one pump session to the next. The amount of fat your body produces is exactly what your baby needs. You can change the kinds of fat your body produces by the foods you eat. However, you can not increase the amount of fat in your milk by eating or drinking specific foods. The change in the amount of fat is done naturally through hormones.
Does my milk change even though I’m strictly pumping like a nursing mom does?
Absolutely! Yes, our milk can change to meet our baby’s needs just like a nursing mom does. Our bodies do amazing things! Just by cuddling, skin to skin, and contact with our baby’s saliva our bodies knows to adjust the amount of fat, nutritional value or antibodies if sick.
What are some necessities for an exclusive pumper?
- A pump that the mother responds well too.- A double electric pump with a letdown mode typically works best for when strictly pumping. However, if a mother responds best to a manual pump over an electric pump, by all means, use what works best for you. A hospital grade pump is not needed to succeed at exclusively pumping but may be beneficial. (See our file on how to get a breast pump through insurance.) http://breastfeedingstruggles.com/a…
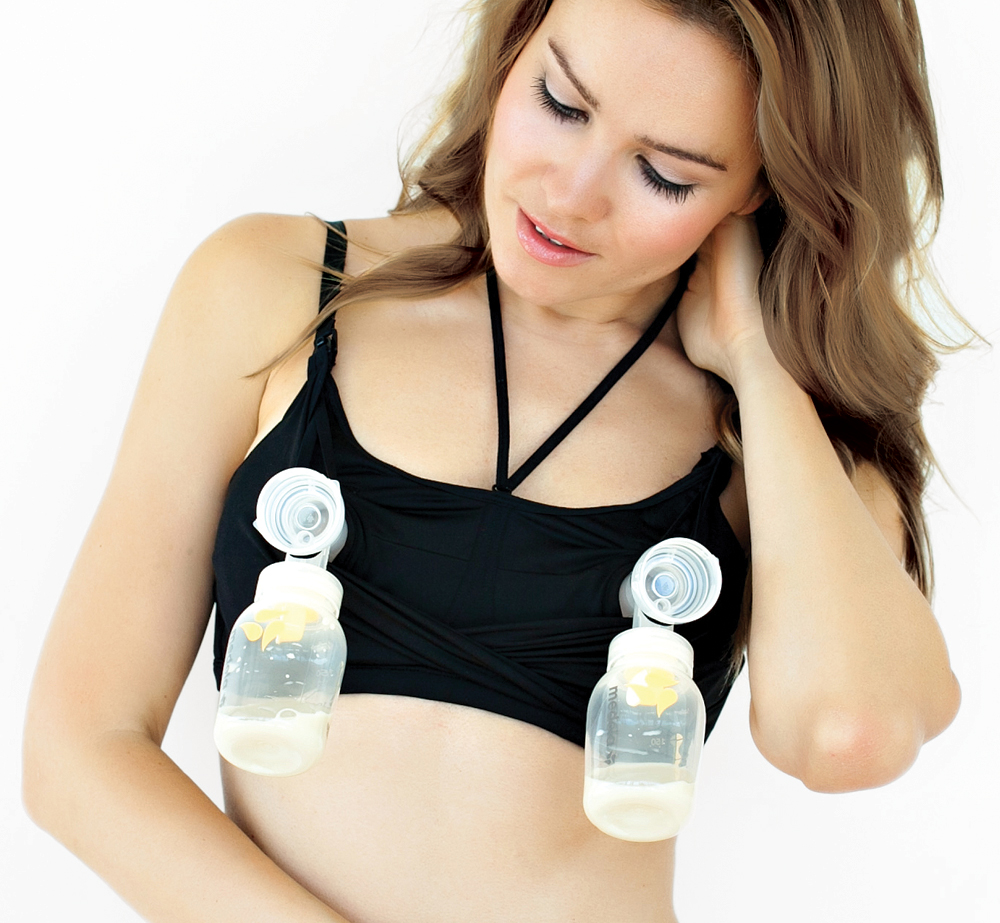
- A hands-free bra- A hands-free bra can be a great tool to have. This makes it easier not only to pump but to take care of your little ones at the same time. Medela and Simple Wishes brands are great but there are many different styles out there. If you don’t want to purchase a hands-free bra you can make one on your own out of a sports bra or swim. If you decide to make your own bra remember the holes need to be slightly smaller than the tunnel part of the flange to stay in position or in the case of stretching. See Youtube for DIY tutorials. The key with any hands-free bra is having the correct size. Having too tight of bra can restrict milk flow and cause clogged ducts. Having too loose of a bra can effect suction quality.
- Flanges- The flanges also are known as breast shields are the cone shaped breastfeeding shield that presses to your breast. It’s important for a mother to be using the correct flange size for her body to get the best experience from her pump. Flange size can change throughout your breastfeeding journey and can vary one breast to the other. If you are not sure about what size works best for you please see our flange size file. https://www.facebook.com/notes/2878…
- Extra supplies/parts (bottles, flanges, valves, membranes, storage bags) First, a mother will want plenty of bottles or bags to pump into and to store with. An eper also might find it helpful to have a few extra sets of flanges. No matter what style of pump you use there certain parts that need to be replaced routinely to maintain the quality of suction and for the mother to get the best response from her pump.
The valves need to be replaced every 3-4 months. Sooner if cracked, bent, molded, or no longer fits tightly on the flange.
The membranes need to be replaced every 3-4 weeks. Sooner if ripped, punctured, molded, or no longer lays flush with the valve when wet and held in the upright position.
Tubing doesn’t need to replace unless molded or stretched/cracked. Tubing can be damaged by pulling at an angle or wiggling to unplug from face-plate of the pump. When unplugging place fingers as close to face-plate of the pump as possible and pull straight out. If you feel the ends of tubing is stretched or cracked you could try to cut a small amount off with scissors. Note this is not necessarily recommended by pump brands but may save you money. This is a chance you take at your own risk. To get the longest lifespan out of your tubing make sure to dry thoroughly after each session.
Some pumps use duckbills (Spectra for example) instead of a valve/membranes system. These need replaced every 5-6 months. Sooner if the open slit is ripped/stretched, molded or the duckbill no longer fits tightly against the flange. To get the most life out of the duckbill do not shove anything through the opening to clean.
Some pumps (Spectra and Medela Freestyle for example) have back-flow membranes or protectors. These should be replaced every 6 months. Sooner if ripped, punctured, molded, no longer tightly fit protector piece, or are allowing milk into the tubing.
- Storage bags or bottles for freezing milk: Most exclusive pumper prefer the sterilized breast milk freezer bags when storing frozen breast milk because these can be laid flat to maximize the most space in your freezer. However, these can not be reused so some do prefer to freeze in bottles. When freezing it’s best to freeze in small amounts (2-4 Oz) to minimize waste. Frozen milk may develop what looks like freezer burn spots. However, this is not freezer burn but the fat that has started to separate as milk began to freeze.
- A car adapter for pump or battery pack: These two products come in handy for when the exclusive pumper needs to pump while on the go. The car adapter would allow you to pump in the car. The battery pack allows you to pump anywhere needed and is great to have in case of a power outage. However, these two products do impact quality of suction and you may notice you need the suction level set higher or take longer to express milk thoroughly.
Why is there moisture in my tubing?
Most of the moisture in the tubing is caused by our body heat. This also can be a sign it is time to replace membranes on your pump. It is important to completely dry tubing after every pump session to avoid mold growth in the tubing or in the pump itself. This can be done one of three ways:1. Unplug tubing from the flanges and turn the pump on high until all moisture is gone.2. Swing tubing around like a lasso until all moisture is gone. Be sure to make sure you have enough space first and no one is too close. 3. Hang dry.Tubing only needs to be cleaned if milk gets into the tubing. If milk gets into tubing clean the tubing and follow directions for how to clean the inside of the pump as described in your manual.
Is there an extra cleaning or sterilizing I should be doing with my pump?
An open system pump such as the Medela Personal In Style Advanced along with other open system pumps requires a monthly maintenance to prevent mold growth in the pump and to maintain the quality of suction. See manual for directions on how to properly clean and sterilize. Most pump brands recommend sterilizing once a week if not more frequently. However, it is personal decisions on how often you sterilize parts.
Flange Sizing:
For a mother no matter if exclusively pumping or just an occasional pumper to get the best experience from her pump needs the correct flange size for her body. This information is from Medela’s blog, but these guidelines are similar to all breast pump brands if their pump allows for different flange sizes. Although most women respond best to these guidelines there are mothers who respond better to the “incorrect” flange size. Finding the proper fit for you may take some experimenting with different sizes. I’d like to add to this article if frequently getting clogged ducts not caused by an oversupply or missed nursing/pumping session that could be another sign you are not using the correct flange size. Also if you find pumping is still uncomfortable with the correct flange size first make sure you are setting suction level properly. Higher the suction doesn’t necessarily mean you’ll express milk faster or get more out of your breast. Having suction too high or too low can actually take your body longer to express milk and lessen your output. What you want to do to set suction level properly is to slowly increase the suction until it’s just uncomfortable and then decrease the suction back slightly to a comfortable suck. If the suction level and flange size are correct to try using coconut oil or hand express a bit of breast milk as a lube while pumping to lessen the friction. ***Note: Please do NOT post pictures or video here. Unfortunately, because of Facebook policy, we can’t allow nipple pictures or videos to posted in the group unless actively nursing. If you need assistance with finding the correct flange size please leave a comment for an admin/mod to message you and we will try to respond as soon as possible. Medela Breastshield Sizing Guide: Having properly fitted breast shields isn’t just a matter of comfort, it’s important for pumping efficiency too. Using breast shields that are too large or too small can significantly reduce the amount of milk you can pump and cause unnecessary discomfort, which is why choosing the PersonalFit Breastshield size that’s right for you is key to pumping success. Been pumping for a while now? Don’t stop reading. Your breast shield size could change over the duration of your breastfeeding journey, so even if you’ve been pumping for several months, it’s possible that you may benefit from a different size.
Understanding Medela’s PersonalFit SizingPumping should not hurt, ever. For maximum comfort and pumping efficiency, Medela offers five different breast shields sizes that are compatible with all Medela breast pumps:
21 mm
24 mm (the size included with all Medela breast pump kits)
27 mm
30 mm
36 mm
24 mm is our most standard size based on data we receive from our healthcare experts. You may need a different size based on your anatomy or other factors, such as needing a different size per breast or the point you’re at in your breastfeeding journey. As their breasts adapt over the course of lactation, some moms may find that they need a larger size breast shield, while other may benefit from a smaller size.In order to find your optimal flange size, you can measure your nipple diameter:
1 Using a ruler or measuring tape, measure the diameter your nipple at the base (across the middle) in millimeters (mm). 1 cm = 10 mm. Do not include your areola.
2 Based on your measurement, use the guide below to determine your PersonalFit breastshield size.
So, for example: If your nipple measures 16 mm in diameter, your recommended PersonalFit breast shield size is 21 mm because the 21 mm shield fits nipples up to 17 mm in diameter. If your nipple diameter measures 24 mm, your recommended size would be 30 mm.
A note about nipples:Be sure to understand the difference between your nipple and areola. Your areola is the darkened area on your breast around your nipple. Your nipple is the projection of your mammary gland from which milk is produced.
Testing Your Breastshield Size
To confirm which size breast shield is the best fit, you should watch the nipple movement during pumping. Your breast shield size also depends on your breast tissue and skin elasticity (not just nipple size alone). In order to determine if your PersonalFit breast shield is the right size, you can perform a quick test using your pump and the breast shields that came with it.
1 Start with the 24 mm breast shields that were included with your pump (or the size determined by measuring your nipples).
2 Center your nipple and gently hold the breast shield against your breast. Be careful to not press breast shields too hard against your breasts when pumping – this can block your milk ducts!
3 Adjust your pump’s vacuum for your Maximum Comfort Vacuum* to achieve an optimum suction level, turning the vacuum up until slightly uncomfortable and then down a notch. (*Maximum Comfort Vacuum refers to the highest but still comfortable vacuum setting while pumping. Pumping at Maximum Comfort Vacuum increases pumping efficiency.)
4 Refer to the below images while pumping:
Small
If your breast shield is too small, your nipple will rub along the side of the tunnel. Try a larger size.
Too Large
If your breast shield is too large, your nipple, along with excessive areola, will be pulled into the tunnel. You may benefit from a smaller size.
Correct Fit
When your breast shields fit correctly, your nipple will be centered in the breast shield tunnel and move freely during pumping.
Should You Try a New Size?
If you’re wondering whether your breast shields are the right size for your nipples, ask yourself the following questions:
Does your nipple rub the sides of the tunnel to the point of causing discomfort?
Do you see excessive areola being pulled into the tunnel?
Do you see any redness on or at the base of the nipple during and/or after pumping?
Is your nipple or areola turning white during and/or after pumping?
Do your breasts still feel full after pumping?
If you answered “YES” to any of these questions, we suggest you consider trying a new size by following the measuring instructions above.
How do I go about weaning from exclusively pumping?
When you are ready to be done exclusively pumping there are two different methods a mom could try to wean from the pump. The first method would be shortening one pump session by 5 minutes every 3-5 days or 5-7 days if the mother has a large oversupply until that one pump session can be completely eliminated. Start with the pump session that has the lowest output and saving the pump session with the largest output for last. The second method of weaning would be to shortening pump sessions by the number of ounces you are expressing. You’ll want to gradually decrease the amount by only 1 or 2 ounces at a time. What this means if you usually pump 5 ounces per session once you’ve reached 3-4 ounces of milk you stop pumping. No matter which method you do you need to do so very slowly and keep a watchful eye out for
clogged ducts.
What are some tips for Exclusive Pumper?
1 Using the correct flange size can make the world of difference with pain, output, and the amount of time it takes you to express milk. See flange sizing file for more information.
2 If your pump has the letdown mode don’t be afraid to use it! Use it as often as you need.
3 Relax, massage, use heat, and repeat! –When pumping try to relax however you can. Some find looking at pictures or videos of their little ones help encourage letdowns. Others find doing something you enjoy helps milk flow. Examples play on phone, color, music, read. . .
4 Massaging while pumping can help milk flow. Massage all the way from the collarbone and armpit because the glands extend that far moving towards your nipples. Some find using an electric toothbrush or a “personal massager” works better than just using your hands. Focus on engorged areas and mix up the type of movements. Massage in circles, long strokes, and breast compressions.
5 Using warm compresses may also help milk flow by relaxing breast glands. Lansinoh makes breasts compresses that fit around the flange so you don’t have to hold them. However, if you don’t want to go purchase these or another brand you could make one out of a sock and some rice.
6 A hands-free bra can be extremely helpful in multitasking.
7 Use a bit of coconut oil, olive oil, or expressed breast milk as a lube while pumping to lessen friction and make it more comfortable.
8 Avoid looking or watching your bottles fill with milk. This can cause unneeded stress that may prevent a letdown or hinder milk flow.
9 Make sure you are getting enough calories each day (300-500 additional calories) and fluids (drink to thirst).
10 In order to save time between sessions, a mother may choose to store her pump parts in the refrigerator to avoid washing after each session. This is what you usually do when you store your milk as well. Then rinse off the flange and all breast parts. Next thoroughly dry and store in a zip-lock bag with extra towels. The idea is that the pumps stay cold enough to prevent bacteria growth and if there happens to be any leftover milk in the parts that it does not spoil. Please know that this is not recommended by breast pump manufacturers as it increases the chances for mold growth in parts. This is why it is important to dry completely before storing in the refrigerator and to wash once you get home.
11 If going out; set an alarm clock for shortly after you are expected home to remind you to take care of your milk.
12 Don’t be afraid to pump in public! Use the two shirt system and a nursing cover.
Tips and tricks to maximize pump output:
1 Make sure the area you are pumping in is warm.
2 Use warm, moist compresses or a heating pad on breasts (or take a shower) prior to pumping.
3 Massage the breast before and/or during pumping.
4 Practice hands on pumping.
5 Keep a routine, consistent pumping schedule.
6 Relax, breathe deep, and visualize the milk leaving your ducts and flowing into the bottles.
7 Use a hands free apparatus (see below for a DIY and a commercial version) and read a book, listen to music, watch TV, or play on Facebook.
8 Cover your breasts so you aren’t focused on how much milk you are pumping or when you are having let downs.
Keep photos and videos of your baby on hand to help stimulate let downs.
9 Record your baby’s cries to listen to while pumping
Lean over, lay your head on the desk, and meditate. Consider investing in pumpin’ pals flanges which will do the leaning for you!!
10 If possible keep your pump plugged in and ready to go at all times so you don’t have to bother with setting it up every time you pump.
11 When you have a spare hour try power pumping (see below).
12 Learn about your pump settings!! Most pumps have a quick (let down) and a slow cycle. Whenever milk is not flowing use the quick cycle (or let down/expression phase). When milk starts flowing switch to the slower phase.
13 Re-position the flanges on the breast occasionally to gain access to hard to reach ducts.
For info on hands ON pumping: http://med.stanford.edu/newborns/pr…
For a commercial version of a hands FREE pump bra: https://www.amazon.com/Simple-Wishe…
For a DIY version of a hands FREE pump bra: http://themommydialogues.com/diy-ha…
Link to buy a supplemental nursing system: https://www.amazon.com/s/ref=nb_sb_…